Norfolk Island Pine Bonsai Care: Nurturing for Best Growth
Hey there, bonsai lovers! It’s Raima here, your friendly neighborhood bonsai enthusiast. I’ve been tending to these miniature marvels for over a decade now, and let me tell you, it’s been a journey filled with growth, both for my trees and myself. Today, we’re diving into the world of Norfolk Island Pine bonsai care. Don’t let the name fool you; these aren’t your typical pines, but they’re just as charming!
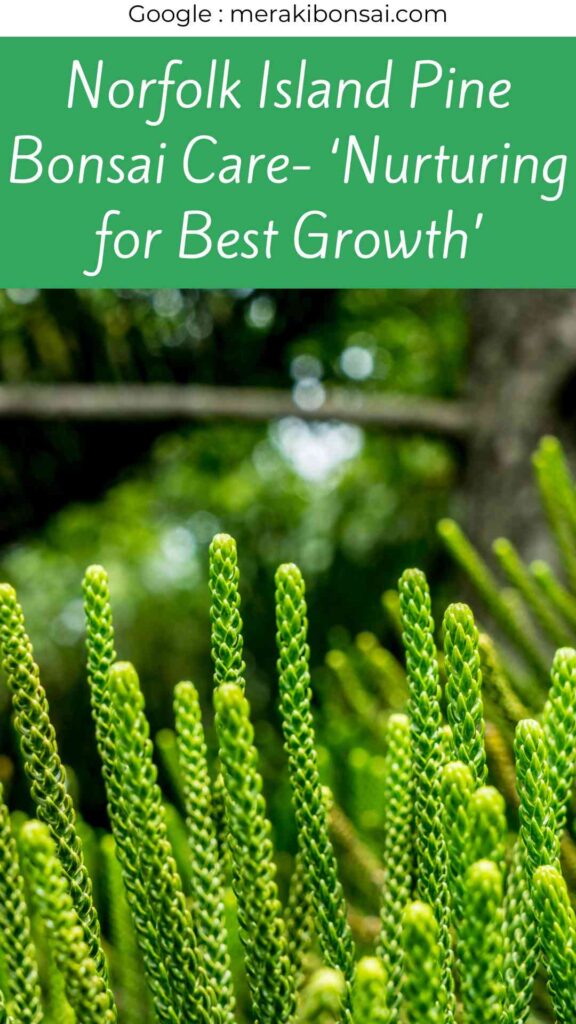
First things first, let’s get acquainted with our star. The Norfolk Island Pine, scientifically known as Araucaria heterophylla, is a unique tree that hails from the South Pacific. It’s not a true pine, but its symmetrical branches give it that classic Christmas tree look. As a bonsai, it brings a touch of the tropics right into your home.
Now, you might be wondering, “Raima, why should I choose a Norfolk Island Pine for my bonsai adventure?” Great question! These trees are perfect for beginners because they’re quite forgiving. They adapt well to indoor conditions, which is a huge plus if you’re living in an apartment or don’t have outdoor space. Plus, their distinctive tiered growth pattern makes them stand out in any bonsai collection.
Let’s break down everything you need to know to help your Norfolk Island Pine bonsai thrive. We’ll cover location, watering, soil, light, fertilizing, pruning, wiring, repotting, and even how to tackle those pesky pests. By the end of this guide, you’ll be well on your way to becoming a Norfolk Island Pine bonsai pro!
Location, Location, Location
Your bonsai’s home is crucial. Norfolk Island Pines prefer a spot with bright, indirect sunlight. A south-facing window is ideal, but make sure to shield it from harsh afternoon rays. These trees love a bit of humidity, so consider placing a humidity tray nearby or misting the leaves occasionally.
During warmer months, you can give your bonsai a vacation outdoors. Just make sure it’s in a shaded area to avoid leaf burn. When fall rolls around, bring it back inside before the first frost. Remember, these trees are tropical, not frost-hardy!
For those of you in apartments or with limited natural light, don’t fret! You can supplement with grow lights. I personally use and love these Bonsai Indoor Lights. They provide the right spectrum of light to keep your bonsai happy year-round.
Watering: The Lifeblood of Your Bonsai
Watering is where many beginners stumble, but don’t worry, I’ve got you covered. Norfolk Island Pines like their soil consistently moist but not waterlogged. Think tropical rainforest, not swamp! Water when the top inch of soil feels dry to the touch.
Here’s my foolproof method: use a Soil Moisture Meter. It takes the guesswork out of watering. When the meter reads in the ‘dry’ zone, it’s time to water. And speaking of watering, a Watering Can with a fine nozzle is a game-changer. It lets you control the flow, ensuring you don’t dislodge soil or damage delicate roots.
Remember, consistency is key. Erratic watering can lead to stress, and a stressed bonsai is more susceptible to pests and diseases. Also, avoid getting water on the needles, as this can lead to fungal issues.
Soil: The Foundation of Health
Now, let’s talk dirt! Well, not just any dirt. Bonsai soil is a special blend that provides the right balance of water retention and drainage. For Norfolk Island Pines, I recommend a mix of akadama (a type of clay), pumice, and organic matter like peat or coconut coir.
This mix allows roots to breathe while holding enough moisture. You can find pre-mixed bonsai soil, or if you’re feeling adventurous, mix your own. Just remember, good soil is an investment in your bonsai’s future.
When it comes to pots, drainage is non-negotiable. I love using these Ceramic Bonsai Planter Pots because they have adequate drainage holes and come in gorgeous designs. For more traditional looks, these Bonsai Pots are fantastic. Remember, the pot should complement your tree, not overshadow it.
Lighting: Basking in the Glow
Norfolk Island Pines are sun-lovers, but they can’t handle intense, direct sunlight. Aim for bright, indirect light. If your pine starts to look pale or its growth is leggy, it’s crying out for more light. On the flip side, if needles turn brown or fall off, it might be getting too much sun.
As I mentioned earlier, if natural light is a challenge, grow lights are your friends. They’ve been a lifesaver for my indoor bonsai collection. Just make sure to choose ones specifically designed for plants.
Fertilizing: Food for Growth
Just like us, bonsai need their nutrients. During the growing season (spring through fall), I fertilize my Norfolk Island Pine every two weeks with a balanced, water-soluble fertilizer. This Fertilizer has been my go-to. It provides all the essential nutrients without the risk of burn.
In winter, your bonsai’s growth slows, so reduce fertilizing to once a month. Over-fertilizing can lead to salt buildup in the soil, which can harm your tree. Always follow the package instructions – more isn’t always better!
Pruning: Shaping Your Masterpiece
Pruning is where the art in bonsai really shines. With Norfolk Island Pines, less is more. These trees have a naturally pleasing shape, so heavy pruning isn’t necessary. Instead, focus on maintaining the tree’s health and enhancing its natural beauty.
First, remove any dead, diseased, or crossing branches. This improves air circulation and the tree’s overall vigor. Next, you can selectively prune to encourage a more compact growth or to accentuate the tiered pattern.
For precision work, I swear by these Bonsai Pruning Scissors. They’re sharp and ergonomic, making delicate cuts a breeze. For larger jobs, this Bonsai Pruning Tools set has everything you need.
Remember, every cut is permanent, so prune with purpose. And always use clean, sharp tools to prevent injury and disease.
Wiring: Guiding Growth
Wiring is a technique used to shape branches and trunk. With Norfolk Island Pines, it’s a bit tricky because their branches are brittle. If you decide to wire, use the utmost care and only wire young, flexible branches.
I prefer Anodized Aluminum Wire for deciduous trees and Annealed Copper Wire for conifers like our Norfolk Island Pine. The copper is stiffer and holds shape better. Always pad the wire where it contacts the branch to prevent damage.
Remember to check your wiring regularly. As the branch thickens, the wire can cut into the bark. If this happens, remove the wire immediately to prevent scarring.
Repotting: A Fresh Start
Repotting is like giving your bonsai a new lease on life. It refreshes the soil, trims overgrown roots, and gives your tree room to grow. For a Norfolk Island Pine, repot every 2-3 years, or when it outgrows its current pot.
The best time to repot is in late winter or early spring, just before the growing season kicks in. Gently remove your tree from its pot, trim away about 1/3 of the roots, focusing on the thickest ones. Then, replant in fresh bonsai soil.
After repotting, place your bonsai in a shaded area for a few weeks. This reduces transplant shock and allows the tree to recover. Water carefully during this period to encourage new root growth without oversaturating the soil.
Pests and Diseases: Unwanted Guests
Even with the best care, pests can still find their way to your bonsai. Common culprits for Norfolk Island Pines include spider mites, mealybugs, and scale insects. These tiny terrors can cause needle drop, discoloration, and overall decline.
At the first sign of pests, isolate your infected bonsai to prevent spread. Then, treat with an Organic Insecticide. I prefer organic options because they’re effective without harming beneficial insects or your tree.
As for diseases, root rot is the main concern. It’s usually a result of overwatering or poor drainage. Prevention is key: ensure your pot has proper drainage holes and avoid letting your bonsai sit in water.
Wrapping Up: Your Bonsai Journey
There you have it, my bonsai buddies! Everything you need to know to nurture your Norfolk Island Pine bonsai. Remember, bonsai is a journey. Each tree is unique, and part of the joy is learning its individual quirks and needs.
Don’t be discouraged if you make mistakes. I’ve had my share of bonsai blunders, but each one taught me something valuable. The key is patience, observation, and a willingness to learn. Your Norfolk Island Pine isn’t just a plant; it’s a living art piece that will grow and change with you.
If you found this guide helpful, consider supporting my work. Your donations keep this blog running and allow me to share my bonsai passion with more people. Every little bit helps, so if you can, please buy me a coffee. Your support means the world to me!
Now, let’s tackle some common questions about Norfolk Island Pine bonsai care:
- Q: How often should I water my Norfolk Island Pine bonsai?
A: Water when the top inch of soil feels dry. This could be every 2-3 days in summer and once a week in winter. Always check with a moisture meter to be sure. - Q: Can I grow a Norfolk Island Pine bonsai outdoors?
A: Yes, during warm months in a shaded area. But they’re not frost-hardy, so bring them indoors before temperatures drop below 50°F (10°C). - Q: Why are my bonsai’s needles turning brown?
A: This could be due to overwatering, underwatering, too much direct sunlight, or low humidity. Adjust care accordingly and monitor your tree’s response. - Q: How do I increase humidity for my bonsai?
A: Use a humidity tray (a shallow tray with pebbles and water), mist the needles occasionally, or use a small humidifier near your bonsai. - Q: Can I propagate my Norfolk Island Pine bonsai?
A: Yes, through seeds or cuttings. Cuttings are easier for beginners. Take a 4-6 inch tip cutting in spring, dip in rooting hormone, and plant in moist bonsai soil. - Q: How long does it take to grow a Norfolk Island Pine bonsai?
A: Patience is key! From seed, it can take 5-10 years to develop a mature bonsai. Starting with a nursery plant can speed up the process. - Q: My bonsai has sticky leaves. What’s wrong?
A: This is likely honeydew, a sign of sap-sucking pests like mealybugs or scale. Isolate your tree and treat with an organic insecticide. - Q: Can I use regular potting soil for my bonsai?
A: No, regular soil doesn’t provide the drainage bonsai need. Use a well-draining bonsai soil mix for best results. - Q: How do I know if my bonsai needs repotting?
A: Signs include roots circling the pot, soil breaking down, or water running straight through the pot. Most Norfolk Island Pines need repotting every 2-3 years. - Q: Can I keep my Norfolk Island Pine bonsai in my bedroom?
A: Absolutely! Just ensure it gets enough indirect light. If not, supplement with grow lights. Plus, it can help purify the air in your room!
There you have it, folks! With these tips and FAQs, you’re well-equipped to start your Norfolk Island Pine bonsai adventure. Remember, every bonsai tree tells a story – yours is just beginning. Happy growing, and don’t forget to share your progress with me. Together, we’ll create tiny forests that bring joy for years to come! 🌿🌳💚